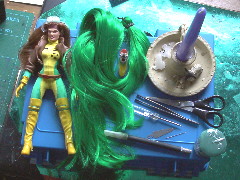
Re-Rooting by Candle...

Here we go then, the arcane secret of re-rooting by candle revealed!

Before starting though, check that the hair you'll be using melts well in a naked flame. Also round yourself up a CD or three to listen to as you work. Re-rooting is pretty easy... but damned tedious.

General Tips

(i) Work in shifts - don't try to do it in all one sitting else you'll go nuts! To fully re-root an FC head can take between 4 to 6 hours total.

(ii) You'll be doing a lot of bending to pick up the needle each time so make sure your worksurface is at a decent height otherwise you'll do you your back in!

(iii) Keep your fingers clean. Some hair when melted can leave an ashy residue; keep this off your fingers and especially off the FC's face otherwise the ash will get into the vinyl and add a slight grey hue to the figure's head.

(iv) Don't skimp on the holes! It can be veerrrrry tempting... but chances are when you've finished you'll notice bald spots. You may even want to add a few extra holes (hairlines around the ears can usually be improved). You can either make a guide hole with the pointy screwdriver first, or just plunge the hair-threaded needle on through. BUT, you might end up having to root every other hole round the back of the head; a lot depends on the hair you use - if it melts well, the head might get filled with the melted lumps and it'll become harder and harder to root the hair through - this is why it's important to start your re-rooting at the front of the head and work backwards; any missed holes would stand out a mile on the FC's forehead !

(v) Make sure you've got a good supply of wide-eyed needles; I tend to get through a couple each re-root; the eye occasionally snaps. I use Milward Tapestry needles (size 24). The threader I use is made by US company Lo Ran - search in the tapestry as well as the sewing depts of the stores.

(vi) Scented candles? As you're going to be melting the doll hair, things might get a bit stinky so (a) work in a well ventilated room and (b) you could use scented candles to root by and/or to help battle the melted plastic smells.

(vii) IMPORTANT - remember folks, never leave lighted candles unattended! And while you're re-rooting, remember to to keep the already rooted hair away from the flame.

(viii) Always root hair an inch or so longer than the finished figure will need - it's far easier to cut doll hair than lengthen it!

Re-rooting...

Items required...

Base FC, hair, lighter, candle, scissors, tweasers, heavy duty threader, wide-eyed needle, craft knife, scented candle (optional), pointy screwdriver, hair-colour matching paint, brush.

I used a hair dryer this time to warm the plastic for hand/foot removal.


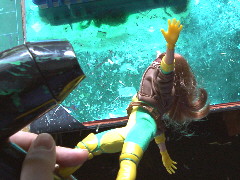
Used a scrap of Velcro from another outfit to guard against snagging while removing Rogue's outfit.

Tied her hair in a pigtail and cut it off, saving it for another re-root.

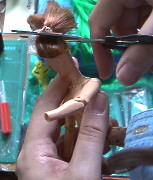
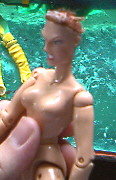
Finished trimming her hair right down to the scalp.

Then, as she'll have long hair, I sliced into the back of Rogue's head; from below the hair line down to the bottom of her head...

This helps with the removal of the head because of the SOB neck joint that tends to rip the whole post out of the neck! And, as she'll have long hair the 'scar' will be hidden.

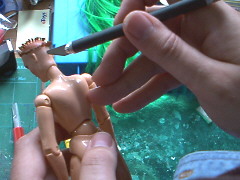
Cut off the inverted 'V' section to make any future head removal far easier!

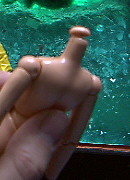
Take a screwdriver and scrape and worry away inside Rogue's head, pulling out the tufts of hair.

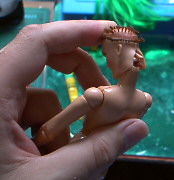
After a while you should have a nice bald, empty FC head. You might want to add a few extra holes now with the pointy screwdriver - Rogue really needs a lower hairline.

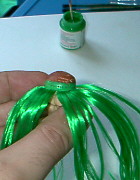
Cut off some of the hair you'll be re-rooting with.

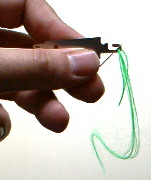
You'll need about the same amount, or perhaps a strand or two more, than you cut off.

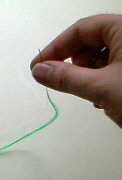
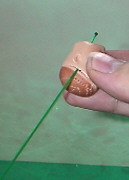
Thread through the needle, and poke it through a hair hole (I work right to left, front to back).

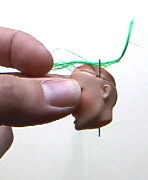
If the needle & hair won't go through cleanly, poke away with the pointy screwdriver (or cocktail stick, or similar).

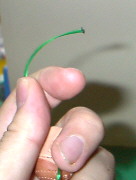
Pull the hair through the hole... but not all the way!

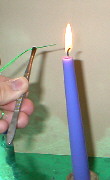
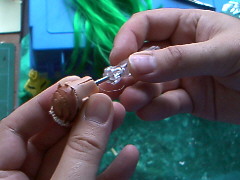
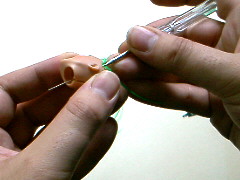
Remove the needle. Grip the ends of the hair (you may have to dampen them slightly to get them all together neatly) that you've just threaded through with the tweasers and melt the ends in the candle flame. You should end up with a nice melted lump.

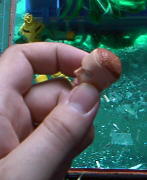
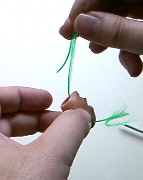
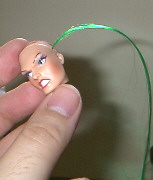
Wait a couple of seconds for the lump to cool, then pull the hair back into her head.

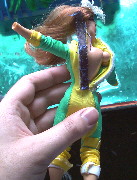
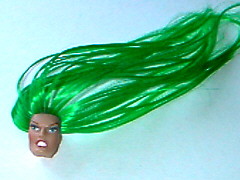
Ta-da! One hole down... another hundred or so to go ;) It took me about an hour to complete her new front hairline, from ear to ear.


But before starting work on the next row, now's the time to paint the scalp, up to and just over the next row of holes. DON'T try to shortcut this step by painting the whole scalp; for as you handle the head during re-rooting you'll only get paint on your fingers... and then rubbed into the head's vinyl. Leave the paint to dry well... and then start on the next row.

Repeat 'til finished.


Next... Taming the re-rooted hair!

Back to the FAQs

Return to the Toybox